Wednesday, December 29, 2010

Christmas Wrap Up

Christmas was truly joyous this year. I spent time celebrating with both my family as well as my husband's family. I even spent time with my mom's family, seeing my aunts, uncles, and cousins, some of whom I hadn't seen in two years! It's always a great time gathering with family and spending time with one another.

I also got some fantastic gifts, and while I know it isn't just about the gifts, let's face it, they are fun! I thought I'd share some of my favorite ones here.

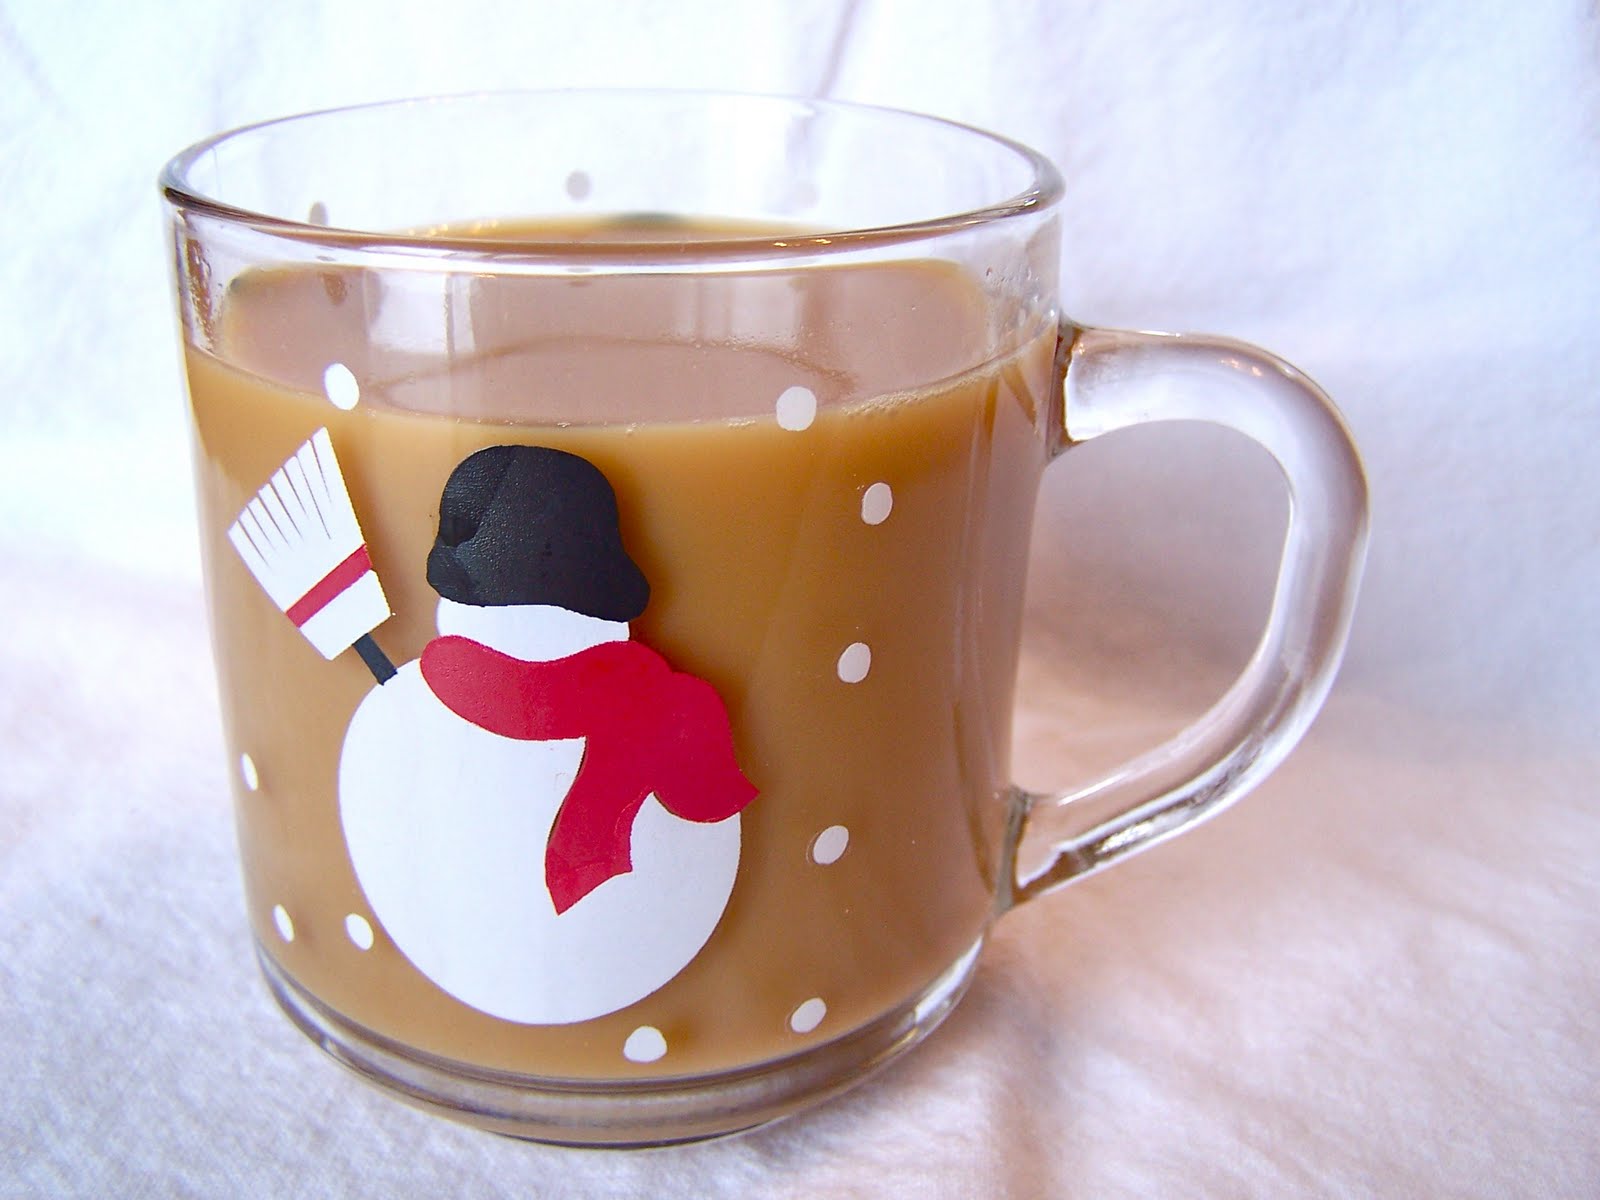
When I was in Ohio, at our "Christmas appetizer" (the term my son gave this party because it was before Christmas), I received a Starbuck's gift card! Yay! I love Starbuck's, but I won't indulge without a gift card or good reason, so now I have a reason!

My husband got me three cool gifts that I love! First, in my stocking I got Fannie May eggnog creams and peppermint creams. Yum! Second, he got me the perfume I wanted, Elizabeth Taylor's Passion. The bottle is so 80's excess, yet so art deco cool, that I think it looks beautiful on my bathroom counter. We thought the design might be just old enough to be considered "retro" now. And finally, the third gift from my husband that I won't stop wearing is my Ohio State winter hat. Red and white stripes, a pompom at the top, and braided side strings with and embroidered "O" in the middle, what's not to love? (And I got my favorite movie of all time, "That Thing You Do" on DVD!)

From my brother-in-law's girlfriend I got the best homemade toffee and some awesome hand and foot cream. Finally, from my mother-in-law I got two most excellent books, "Cookie Craft" and "What's New, Cupcake?". Can't wait to try some of the cool and fun techniques in these books for yummy AND cute treats!

All in all, I had a wonderful mix of family, fun, and amazing gifts!

Friday, December 24, 2010

Almond Coffee


If you are looking for a warm and yummy way to start your Christmas morning, or a yummy and warm way to end your Christmas dinner, then this is the drink for you. Steaming, creamy and almondy, this coffee hits the spot for a special occasion.


Almond Coffee

2 cups strong brewed coffee, hot
2 cups milk, warmed
1 teaspoon vanilla extract
½ teaspoon almond extract
1½ tablespoons sugar, or to taste

Combine all ingredients and stir to mix well. Taste for sweetness and add more sugar if desired. Pour into four coffee mugs and garnish with whipped cream and a sprinkle of cinnamon if desired.


Notes: If you have some lactose issues (as I do) you can substitute almond milk for the regular milk (and it is a bit more authentic, then!). If you use the vanilla flavored almond milk, do not use the vanilla extract and you may want to reduce the sugar slightly.

Merry Christmas Eve to all of my readers! Thank you for sharing in my 12 Recipes of Christmas. I truly enjoyed sharing them with you!

Thursday, December 23, 2010

Truffle Fudge Brownies


Immediately when I hear "truffle" I think fancy. This is decadent and rich, and a little fancy. But most of all, it is luscious and chocolatey! How is that for a description of a dessert? I actually made this for my 15th wedding anniversary in June, but it would end a Christmas dinner very well. Dress it up with some Christmas sprinkles or leave it unadorned. Either way it will be a hit!


Truffle Fudge Brownies

for the batter:
4 tablespoons unsalted butter
3 ounces unsweetened chocolate, coarsely chopped
½ cup all purpose flour
¼ teaspoon baking powder
½ teaspoon coarse salt
1 cup sugar
2 large eggs
¼ cup whole milk
1 teaspoon vanilla extract
for the ganache:
4 ounces quality semisweet chocolate, coarsely chopped
⅔ cup heavy cream
for the garnish:
candy sprinkles (optional)

Preheat oven to 325ºF. Butter a 9-inch springform pan.

Make batter: Put butter and chocolate in a heatproof bowl set over simmering water; stir until melted. Let cool slightly.

Whisk together flour, baking powder, and salt in a bowl.

Put sugar and eggs in the bowl of an electric mixer fitted with the whisk attachment, and mix on medium speed until pale and fluffy, about 4 minutes. Add chocolate mixture, the milk, and vanilla, and mix until combined. Reduce speed to low. Add flour mixture; mix, scraping down sides of bowl, until well combined.

Pour batter into prepared pan. Bake until a cake tester inserted into brownies (avoid center and edges) comes out with a few crumbs but is not wet, 27-30 minutes. Let cool completely in pan on wire rack.

Make ganache: Put chocolate in a medium bowl. Heat cream in a small saucepan over medium-high heat until just simmering. Pour over chocolate; let stand 5 minutes. Gently stir until smooth. Allow ganache to cool, stirring every 10 minutes, until slightly thickened, 25 to 30 minutes.

Pour ganache over cooled brownies in pan; let set, about 20 minutes. Refrigerate until cold, 30 minutes to 1 hour. Let brownies stand at room temperature at least 15 minutes before serving. Scatter sprinkles onto brownies if using. Lift out brownies; cut into wedges, wiping knife with a hot, damp cloth between each cut.


Notes: This is another Martha Stewart recipe. She has the reputation she has for a reason! These are really fantastic and will impress any chocolate lover!


Only two days and one more recipe until Christmas!

Wednesday, December 22, 2010

Beer Bread


Tastefully Simple has made a name on their beer bread. And it is good. But mine is also really good. And when you see how absolutely simple the recipe is, and that you probably have the ingredients in your pantry right now, you will never buy the Tastefully Simple mix again. Which is great because it will leave you more money to buy all the yummy dip mixes they sell! (And no, I am not a Tastefully Simple rep!)


Beer Bread

3 cups all purpose flour
3 teaspoons baking powder
1 ½ teaspoons salt
3 tablespoons granulated sugar
1 12 oz. can or bottle of beer

Preheat oven to 375ºF. Lightly grease 9 x 5 x 3-inch loaf pan.

Combine first four ingredients in a mixing bowl. Pour beer into bowl and stir with spoon until well combined.

Pour into prepared loaf pan and bake for 1 hour.


Notes: Cube this bread and serve with your favorite dip! So good!

Only 3 more days and two more recipes until Christmas!

Monday, December 20, 2010

Bavarian Apple Tart


I'm not sure what makes this tart Bavarian, but I don't really care. What I do know is that this dessert is not only delicious, but also beautiful to look at. It is a sweetened pastry crust, topped with a cheesecake like filling, and that topped with cinnamony apples. Yum!


Bavarian Apple Tart

½ cup butter, softened
⅓ cup sugar
1⅓ cups all purpose flour
¼ teaspoon vanilla extract
1 (8 ounce) package cream cheese, softened
¼ cup sugar
1 large egg
½ teaspoon vanilla extract
⅓ cup sugar
½ teaspoon cinnamon
3 Granny Smith apples, peeled and thinly sliced (4 cups)
¼ cup sliced almonds

Beat butter and 1/3 cup sugar in a small mixing bowl at medium speed with an electric mixer until fluffy. Gradually add flour, beating until mixture is blended. Stir in 1/4 teaspoon vanilla. (mixture will be slightly crumbly.)

Press pastry into bottom and 1 1/2 inches up sides of a lightly greased 9-inch springform pan.

Beat cream cheese and 1/4 cup sugar at medium speed until smooth. Add egg and 1/2 teaspoon vanilla, beating well. Spread filling evenly over pastry.

Combine 1/3 cup sugar, cinnamon, and apples, tossing lightly. Arrange apple slices over cream cheese mixture; Sprinkle with almonds.

Bake in preheated oven at 400ºF for 40 minutes. Cool on wire rack. Remove sides of pan. Serve warm or chilled. Store leftovers in the refrigerator.


Notes: I just had to add a second photo to show how pretty this dessert is on a plate! This is a lovely, fancy dessert that isn't too hard to make. I mixed the cream cheese filling in the same bowl that I made the crust in, no need to clean it first. I also had lots of apples and just layered them twice on top of one another. You will definitely impress people with this dessert!

Friday, December 17, 2010

Chocolate-Mint Cookies


A few years ago my aunt gave me an entire cookbook dedicated to cookie recipes. She obviously knows me well! I read the cookbook cover to cover, keeping a half sheet of paper inside that I could jot down the title and page number of the recipes I wanted to try. While I have tried several, the list is still very long. So at the beginning of December when my church was asking for volunteers to bake cookies as a dessert for a meal at Hesed House, a homeless shelter in our city, I decided to pull out my cookbook and try one of the new recipes. This is the recipe I picked, and the results were delicious!

Chocolate-Mint Cookies

1 cup sugar
½ cup butter, softened
1 teaspoon vanilla
1 egg
2 squares (1 oz. each) unsweetened chocolate, melted and cooled
1 cup all purpose flour
½ teaspoon salt
Peppermint Frosting
2 ½ cups powdered sugar
¼ cup butter, softened
2 ½ tablespoons milk
½ teaspoon peppermint extract
Chocolate Drizzle
2 tablespoons butter
1 tablespoon corn syrup
½ cup semisweet chocolate chips
crushed peppermint candies, if desired

Heat oven to 375ºF. Beat sugar, 1/2 cup butter, the vanilla, egg and unsweetened chocolate in large bowl with electric mixer on medium speed. Stir in flour and salt.

Drop dough by rounded teaspoonfuls about 2 inches apart onto ungreased or parchment lined cookie sheet. Flatten cookies with bottom of glass dipped in sugar. Bake until set, about 8 minutes. Cool 1-2 minutes; remove from cookie sheet to wire rack. Cool completely.

Peppermint Frosting:
Mix all ingredients until smooth and of spreading consistency.

Spread peppermint frosting over each cookie. Melt 2 tablespoons butter, the corn syrup, and chocolate chips over low heat stirring constantly, until smooth. Drizzle mixture over each cookie; sprinkle with crushed candies.

Yield: 3 dozen


Notes: This recipe originally called for double the ingredients in the chocolate drizzle, but I had entirely too much leftover, so I cut the ingredients in half. These cookies are soft and fudgy, and the chocolate drizzle just takes them from good to over the top fantastic. I made some with the candy pieces on top and some without. Both ways were good.

Only 4 more recipes and 8 days until Christmas!

Wednesday, December 15, 2010

Easy Spicy Roasted Potatoes


Whether you want to serve these at dinner with a pork roast, or at brunch along with Country Breakfast Casserole, you can't go wrong with these potatoes. Even my kids love them, and I have picky kids! They are really easy, but taste so good!


Easy Spicy Roasted Potatoes

6 medium red potatoes, diced with peel
1 medium onion, chopped
1 tablespoon garlic powder
1 tablespoon kosher salt
2 teaspoons chili powder
¼ cup extra-virgin olive oil

Preheat oven to 450ºF. Grease 9 x 13 inch baking dish.

Put all ingredients in a large bowl and stir carefully until potatoes and onions are evenly coated with oil and spices. Spread mixture evenly into baking pan.

Bake for 35-40 minutes in preheated oven, stirring every 10 minutes. Potatoes should be fork tender and slightly crispy when done.


I hope you'll give these a try! They are delicious!

Monday, December 13, 2010

Cherry Streusel Coffee Cake


Do you have overnight guests at Christmastime? Or do you like to make your family a yummy and delicious breakfast or brunch during the holidays? Then this coffee cake recipe is for you. It is beautiful to look at, smells heavenly while baking, and tastes wonderful! This is actually a Martha Stewart recipe that I've tweaked slightly. If you want to follow her recipe exactly, then click here. One of the things I really like about this coffee cake is the bounty of sweet streusel on top and the pretty red cherries inside. This coffee cake is truly welcome at any breakfast table on Christmas or New Year's morning.

Cherry Streusel Coffee Cake

1 stick (1/2 cup) unsalted butter, room temperature
2 cups all purpose flour
1 tsp baking powder
1 tsp baking soda
½ tsp salt
1 cup sugar
2 large eggs
1 tsp vanilla extract
1 cup sour cream
1 cup frozen sour cherries, thawed and drained well
Streusel:
½ cup + 1 T. all purpose flour
3 T. packed brown sugar
½ tsp cinnamon
¼ tsp coarse salt
3 T. unsalted butter, room temperature
Milk Glaze:
½ cup powdered sugar
1 T. milk

Preheat the oven to 350ºF. Grease a 9-inch tube pan; set aside. In a medium bowl, mix together the flour, baking powder, baking soda, and salt; set aside.

In the bowl of an electric mixer fitted with the paddle attachment, beat the butter, sugar, eggs, and vanilla on medium speed until light and fluffy, 2 to 3 minutes. Add the flour mixture in three parts, alternating with the sour cream and beginning and ending with the flour. Beat until just combined, scraping down the sides of the bowl as needed.

Spoon about half the batter into the prepared pan. Arrange the cherries in a single layer on top of the batter; avoid placing any cherries against the pan's edge, as they may stick or burn if not fully encased in batter. Top with the remaining batter, making sure it is evenly distributed, and smooth with an offset spatula. Sprinkle streusel evenly over the top of the batter.

Bake until cake is golden brown and springs back when touched, 40 to 45 minutes. Transfer pan to a wire rack set over a rimmed baking sheet lined with parchment paper, and let cake cool 10 to 15 minutes. Invert cake onto rack, then re-invert (so streusel side is up), and let cool completely. Spoon glaze over the cake, letting it drip down sides. Let cake sit until glaze is set, about 5 minutes, before serving.


Only 6 more recipes and 12 more days until Christmas!

Friday, December 10, 2010

Peppermint Bark


I tried this recipe for the first time this year and really loved the results! I've been wanting to make this treat for several years, but never seemed to find the time. I'm glad I made time for it this year. The dark chocolate layer really cuts the sweetness of the white chocolate, and those two layers paired with the crushed peppermint create a perfect little candy!


Peppermint Bark

8 ounces high quality bitterweet chocolate, chopped into small pieces
2 teaspoons solid vegetable shortening, divided
8 ounces high-quality white chocolate, chopped into small pieces
⅛ teaspoon peppermint extract
½ cup candy canes, coarsely crushed

Line a 9x9 inch pan with two pieces of waxed paper, so the paper goes up the sides of the pan on all four sides. Make sure it is smooth and wrinkle free.

Place the bittersweet chocolate and 1 teaspoon of the vegetable shortening in the top of a double boiler over warm water, stirring frequently and scraping down the sides with a rubber spatula to avoid scorching. When the chocolate is completely melted and smooth, pour into the prepared pan. Spread evenly so it covers the bottom of the pan. Sprinkle 1 tablespoon of the crushed candy canes evenly over the chocolate layer. Refrigerate until slightly hardened, about 20-30 minutes.

Place the white chocolate and the remaining 1 teaspoon vegetable shortening in the top of a double boiler over warm water, stirring frequently and scraping down the sides with a rubber spatula to avoid scorching. When the white chocolate is melted, stir in the 1/8 teaspoon peppermint extract. Pour the white chocolate over the bittersweet chocolate layer; spread evenly. Sprinkle the remaining crushed candy canes over the top of the white chocolate and gently press in. Refrigerate until completely hardened. Remove from pan; cut or break into small pieces to serve.


Notes: I actually cheated on this when I bought my candy canes already crushed. I was lucky enough to find these:

This version of peppermint bark is quite chocolatey, with a hint of mint. If you like it more minty, increase the peppermint extract in the white chocolate to 1/4 teaspoon. I used Ghirardelli baking chocolate bars for both layers (60% bitterweet and white chocolate baking bar), you can also use semisweet chocolate if you can't find bittersweet. Please look at the ingredients of the white chocolate you buy, if there is no cacao butter, it is not high quality. Hope you like this as much as we do!

Wednesday, December 08, 2010

Sugar Coated Pecans


There are lots of fancy food gifts that are given at Christmas time. These are fancy. These are easy. These are delicious! Whenever I make these pecans, no one can keep their hands off of them. And making these yourself will save you tons of money on buying something similar to serve or give away. (And anyone who receives them will be begging you to make them more! Soon!)


Sugar Coated Pecans

1 egg white
1 tablespoon water
1 pound pecan halves
1 cup sugar
¾ teaspoon salt
½ teaspoon cinnamon

Preheat oven to 250ºF. Grease a cookie sheet that has sides.

In a mixing bowl, whisk together the egg white and water until frothy. In a separate bowl mix together sugar, salt and cinnamon.

Add pecans to egg white mixture, stir to coat nuts evenly. Remove the nuts and toss them in the sugar mixture until coated. Spread nuts on prepared baking sheet.

Bake at 250ºF for 1 hour. Stir every 15 minutes.

Enjoy!!

Monday, December 06, 2010

Country Breakfast Casserole


Due to some technical difficulties, I was not able to get my recipe up last night. But here is today's recipe, just a little late!

This recipe is from one of my favorite websites, Allrecipes.com. They have so many wonderful recipes there, with lots of user reviews and often, pictures of the recipes. Country breakfast casserole is one of those yummy, homey brunch recipes that everyone seems to love. It has eggs, sausage, gravy, cheese. Really, what's not to love? It is very easy to put together and has become a favorite at our house. When you have family all gathered around for breakfast, why not try this? It is delicious.


Country Breakfast Casserole

1 16 oz. package bulk sausage
2 green onions, chopped
2 cups shredded cheddar cheese
6 eggs, lightly beaten
1 cup water
½ cup milk
1 2.64 oz. package country gravy mix
5-6 slices bread, cut into 1 inch cubes
2 tablespoons butter, melted
paprika, to taste

Preheat oven to 325ºF. Grease an 11 x 7 inch baking dish.

Brown sausage in a large skillet; drain fat.

Combine sausage with green onion and spread evenly across the bottom of the baking dish. Top with shredded cheese. Whisk together eggs, water, milk and gravy mix; pour over cheese and spread evenly. Arrange bread squares evenly on top. Drizzle melted butter over the bread and sprinkle with paprika.

Bake 40 minutes or until knife inserted into the center comes out clean. Let cool 10 minutes before serving.

Enjoy!

Friday, December 03, 2010

Classic Dinner Rolls


Last year I ended my 12 recipes of Christmas with my pretty and tasty Pumpkin Knot Rolls. This year I am adding another yeast dinner roll to the list of recipes because I just enjoy making (and eating) them so much. This is a faster and simpler roll than the pumpkin knot rolls. It is made with quick rising yeast so one of the rising periods of traditional yeast breads is replaced with a ten minute resting period. You will get lots of ooohs and aaahs for homemade rolls, and these make your kitchen smell heavenly!


Classic Dinner Rolls

2 - 2¼ cups all purpose flour
1 envelope rapid rise yeast
2 tablespoons sugar
½ teaspoon salt
½ cup milk
¼ cup water
2 tablespoons butter

Combine 3/4 cup flour, undissolved yeast, sugar and salt in a large bowl. Heat milk, water and butter until very warm (120ºF to 130ºF). Add to flour mixture. Beat 2 minutes at medium speed of an electric mixer, scraping bowl occasionally. Add 1/4 cup flour; beat 2 minutes at high speed. Stir in enough remaining flour to make a soft dough. Knead on a lightly floured surface until smooth and elastic, about 8 to 10 minutes. Cover and let rest 10 minutes.

Divide dough into 12 equal pieces; shape into balls. Place in greased 8-inch round pan. Cover; let rise in warm draft free place until doubled in size, about 30 minutes.

Bake in preheated 375ºF oven for 20 minutes or until done. Remove from pan; brush with additional melted butter if desired. Serve warm.

Yield: 12 rolls


Notes: I make this dough in my stand mixer, which has a dough hook. I do all the kneading with the dough hook, which leaves my hands free to grease the pan and clean up the inevitable mess I've made of the flour or other ingredients on my kitchen counter. In the winter my kitchen is colder than in the summer and my rolls usually take more than 30 minutes to double in size. If I want to hurry the process along, I will sometimes turn my oven to 200ºF and place the pan on the cook top. This seems to provide just enough warmth to move the rising process along to meet my time constraints. This has become one of my favorite go to roll recipes when making homemade rolls. I hope you give it a try and enjoy them as much as my family does!

Only 10 more recipes until Christmas!

Wednesday, December 01, 2010

Butter Meltaways


I had to start my third "The 12 Recipes of Christmas" with a cookie. Nothing says Christmas to me more than Christmas cookies. This is a fairly simple butter cookie that looks pretty on the cookie plate, but more importantly tastes great. It has a great crunchy texture and a sweet, buttery taste that children and adults alike enjoy. You can easily sprinkle this cookie with plain granulated sugar, but at Christmas time I like to mix some red and green sugar in to give it a festive appearance.


Butter Meltaways

½ cup butter, softened
½ cup vegetable oil
½ cup sugar
½ cup powdered sugar
1 egg
½ teaspoon vanilla
2 ¼ cups flour
½ teaspoon baking soda
½ teaspoon cream of tartar
additional sugar

In a mixing bowl, cream butter, oil, and sugars. Add egg and vanilla. Mix. Combine flour, baking soda and cream of tartar; gradually add to the creamed mixture. Mix until all ingredients are incorporated. Chill several hours or overnight. Drop by rounded teaspoonfuls 2 inches apart on ungreased or parchment lined baking sheets. Flatten each dough ball lightly with a glass dipped in sugar. Bake in preheated oven at 350ºF for 12-14 minutes or until lightly browned. Cool on wire racks.

Yield: 5 dozen


Notes: To make the sugar stick to the bottom of the glass, flatten one dough ball first, then dip in sugar and press on cookie again. Next dip glass bottom in sugar before flattening each cookie. You an easily add colored sugar to granulated sugar, or use all colored sugar if desired. Please use a vegetable oil with little to no flavor. I use pure canola oil. Enjoy!

Tuesday, November 30, 2010

The Recipes Are Coming!

I will be launching my third annual "The 12 Recipes of Christmas" tomorrow. There will be another round of fantastic recipes for you to try during the holidays. I make each and every one of these recipes and they have all become cherished at our house. I will have some new recipes that I just discovered this year, along with some old favorites that make our Christmas special each year. I hope you will all come along with me and discover a few favorites for your families, too!

Friday, November 19, 2010

Chocolate

I have a confession to make. I have a new addiction. It's not Bejeweled Blitz or Facebook, (though some in my family may argue otherwise).

I can't stop buying chocolate chips! I currently have eight (8!) unopened bags in my pantry, and that doesn't count the four opened bags I have in there as well. (Or the two bars of bittersweet baking chocolate.)


I can't help it. I love to bake with them, and when the good quality ones go on sale, I stock up. I have nothing against the store brands, in fact I'll purchase them when nothing else is on sale or they are on sale for a great price. But when Nestle's, Hershey's and my all time favorite, Ghirardelli's go on sale, I can't seem to help myself.

In my defense, they are not all semi-sweet. Some are dark chocolate or bittersweet, some are mini's, and one is even white chocolate. And let's face it, this time of year every store puts the name brand chips on sale. And, the manufacturers have all put out coupons, making the savings even greater. So I have lots of chocolate chips at the ready for all kinds of baked goodies. Now the question is, what do I bake first?

Tuesday, November 16, 2010

A Few Cakes

I know my blogging is erratic at best, but I'm trying to get back into it. I am planning on having my 12 Recipes of Christmas again starting in December, and need to get back in the habit of posting (semi) regularly.

I have been making a lot of desserts and cakes lately. In fact, I took a Wilton's beginner cake decorating course back in August and really enjoyed it. It was a gift from my husband who knew I would love it, but probably needed a little nudge to get into it. A lot of it I already knew, but there were some new techniques and tips that I took from the class and has helped improve my cake decorating skills.


I made this cake for my friend Lola who had a little girl in July. This was actually the "graduation" cake I made for my Wilton course. I was really happy with how it turned out. I used a technique called pattern gel transfer to "trace" the outline of the sheep onto the cake. I was really pleased with how it turned out and enjoyed giving it to Lola's family to enjoy. It was a vanilla cake with almond buttercream.


This was my son's 11th birthday cake. He is a big Cubs fan and wanted a big cake to celebrate with. He had a laser tag party with several of his friends, three of which are White Sox fan. They ate the cake, but it did take a little prodding. This is a chocolate chocolate chip cake with vanilla buttercream.


This was my daughter's 8th birthday cake this year. She had asked me several months before her party if she could have a four tiered cake! I told her sure, and she proceeded to sit down and draw a picture of how she wanted her cake. She had an arts and crafts birthday party in our basement and the girls were thrilled with the cake. Half of it is chocolate chocolate chip, the other half vanilla cake. All with vanilla a buttercream.


I made this cake for a cake walk at my kids' school. It is a 6-inch chocolate chocolate chip cake with chocolate buttercream icing. It is "wrapped" in Kit Kats and topped with M&M's. This cake was popular and went quickly!

I plan on sharing more cakes soon. I still have a few more that I am proud of and have never shared here. Hope you have enjoyed seeing them as much as I enjoyed making them.

Sunday, October 31, 2010

Happy Halloween - Cookie Style


I have been dying to make new cookies and test out my decorating talents. I finally did! I am the room mom for my daughter's first grade class, and as such was in charge of her Halloween party this year. Along with planning crafts and games, I came up with some cute cut out cookies to decorate and take in for the kids to eat.


I already had several Halloween cookie cutters, but while hunting for a (cheap) cape for my third grade daughter's vampire costume at Goodwill, I found a set of brand new, still in the package, Wilton Halloween cookie cutters, three of which I did not have. I bought them for 99 cents and added them to my other cookie cutters.


I decided on five different cookie shapes: a ghost, pumpkin, black cat, two different bats, and a Frankenstein. I didn't actually have a Frankenstein cookie cutter, so I used a crimped round cutter and made the face myself. The cookies are chocolate sugar cookies, and the cookie glaze is an allrecipes.com cookie icing recipe. So simple!


The results were pretty much what I was looking for, and the kids all really loved them! I had a lot of fun, too. I think my favorite are the Franks and the ghosts. Now I'm dreaming about pretty Christmas cookies!

Monday, August 02, 2010

Allrecipes Excitement!

It is no secret in my house that one of my favorite websites is Allrecipes.com. So many wonderful recipes with comments and ratings by the users. And most of the recipes are from home cooks like me, so they are very doable and don't usually have exotic ingredients. They also have pictures of the recipes, most posted by users. I love seeing a picture of what I'm going to cook. I have submitted several of my own pictures and enjoy seeing them pop up next to a recipe here and there.

Each day the website has a contest with all the pictures submitted and the top four vote getters are featured the next day on the Allrecipes home page. Yesterday I was picture #3 - the cupcake cookie. That's my username - JOSEPHINE. So excited! I've tried many times to make it into the top four, but this is my first time. Hopefully it won't be my last!

Friday, July 30, 2010

Cookies!!!

I have been away from the blog for awhile now, and I'm trying to get my toes wet again with a new post, hopefully to be followed by more posts.

So my new found passion is cake and cookie decorating. I can't call it new, really. I have been making my kid's birthday cakes for many years now. And I have always aspired to make pretty cookies. But my husband reignited a passion when for an anniversary gift he signed me up for a Wilton cake decorating class. I have thoroughly enjoyed it, and have started searching out cake and cookie related sites and blogs. One of my new favorites is Bakerella. She has some amazing recipes and something called cake pops that I'm dying to try my hand at. (I'll post if I ever actually do!) While searching her blog, I discovered her pretty cookies and found out that she was inspired by a book called "Cookie Craft". I checked it out of the library and was hooked!

I made my first set of fancy cookies two days ago, and decorated them yesterday. I have to admit, for a first effort I'm pretty impressed. I used the sugar cookie recipe from the book but used my own cookie icing recipe that I had tried previously. I loved the results. I used an apple cookie cutter that I've had for quite some time but had never used, and my brand new cupcake cookie cutter I bought at Crate and Barrel last month.

Because I didn't want to make too many icing colors (I am a bit lazy) I frosted the leaf of the apple with white icing and covered it with green sugar. The stem was the same brown I used for the cupcake cups, and then I used red for the perfect apple. I think anybody who loves apples would love a plate of these yummy cookies!

The cupcake cookies reminded Brendan and I more of sundaes than cupcakes, but I love them anyways. I struck to a simple white frosting for each one (see note above about laziness) and made brown cupcake cups for each one. I did try various different sprinkles and designs so that there were several different kind of cupcakes on the plate. I topped most of the cookies with the a red cherry on top (made with the apple red frosting).

All in all I'm quite satisfied with my cookies. The best part is they taste great, too.

Thursday, April 01, 2010

Easter Cakes


We celebrated Easter a week early with my family and this year my mom asked me to make some cake for the festivities. Now if you know my family, you will know that they are not cake people. (Not my husband and kids, but the family I grew up in, and funny enough, all the spouses of my brothers and sister, except mine of course!) They would rather eat pie, cheesecake, baklava, buckeyes, ice cream, dirt pudding, cookies, etc. over cake.

But my mom knows how much I like making cake and thought it might be a nice change for us. So, I searched for some easy and cute cake ideas for Easter. Being that I was traveling to Ohio and making everything there, I didn't want anything too elaborate. I found the bunny cake idea here, and the chick cupcake idea, here.

I made chocolate cake for the two bunnies. The white bunny was made from a round 9-inch pan, the brown bunny from a round 8-inch pan. They were supposed to look like a mommy and baby, but my mom pointed out that it looked more like a mom and teenager bunny.

I made vanilla buttercream for the bigger bunny, and chocolate buttercream for the littler bunny. The ears are just cut out from paper and of course the eyes and nose are jelly beans. The chick cupcakes were lemon cake with lemon buttercream frosting. Delicious!


I was very happy with how cute they were, and the eleven grandkids all thought they were adorable. That didn't stop them from devouring them, though!

Hope you have a great Easter!

Wednesday, March 31, 2010

A Month for One Birthday!

Zoe turned six this month, but it seemed like we were celebrating it one way or another every week this month! I know I baked three different treats for the events, and she made her own ice cream pie to celebrate with. But, it has been fun.


The first treat I baked were cookies called half and halfs. They are a half chocolate chip cookie, and half chocolate chocolate chip cookie, stuck together! I made these extra large and sent them in for her birthday treat for school. According to Zoe, they were a hit!


Because I was making so many cakes/ treats for her birthday parties, I suggested that Zoe make one of her famous ice cream pies for the family to eat on her actual birthday. She chose chocolate ice cream and sprinkled a variety of chocolate chips and sprinkles on top.


The first cake I made was for our family party. Usually, this is the only party my kids have each year. But Zoe has been asking for a "friend" party for quite some time, so we decided that she could have a friend party, too, this year. This cake was a two tier cake. The bottom tier was chocolate chocolate chip cake with vanilla swiss meringue buttercream, the top tier was white almond sour cream cake with almond swiss meringue buttercream. I made the decorations out of marshmallow fondant. Zoe explained the colors and decorations that she wanted, and I came up with this cake.


The following weekend was her friend party. We had ten little girls running around our house having a great time for Zoe's first "friend" party. Zoe loved being the center of attention and also loved her big 6 cake that she requested I make for this party. I took two nine inch chocolate cakes, cut a hole in the middle of one and carved the other one to look like the top of a six. Then I frosted over the whole thing with vanilla buttercream frosting. Zoe requested orange frosting with polka dots, so that is what she got! I was very happy with how the cake turned out.

Overall, I think Zoe would say that her month of birthdays (and treats) was a good one!