Thursday, December 24, 2009
Pumpkin Knot Rolls
Merry Christmas Eve! Here is the 12th and final Christmas recipe for this year. It is a yeast roll that is both beautiful to look at and delicious to eat. And if you have any picky eaters at home, you can feel good that they are getting a little bit of vegetables in their bread! You can't taste the pumpkin in these rolls, but the color is unmistakable.
Pumpkin Knot Rolls
▪ 2 pkgs. (1/4 ounce each) active dry yeast
▪ 1 cup warm milk, (110º to 115º)
▪ ⅓ cup butter, softened
▪ ½ cup sugar
▪ 1 cup canned pumpkin
▪ 3 eggs
▪ 1½ tsp salt
▪ 5½ - 6 cups all purpose flour
▪ 1 Tbsp. cold water
▪ sesame or poppy seeds, optional
In a mixing bowl, dissolve yeast in warm milk. Add the butter, sugar, pumpkin, 2 eggs, salt and 3 cups flour. Beat until smooth. stir in enough remaining flour to form a soft dough. Turn onto a lightly floured surface; knead until smooth and elastic, about 6-8 minutes. Place in a greased bowl, turning to grease top. cover and let rise in a warm place until doubled, about 1 hour.
Punch dough down. Turn onto a lightly floured surface; divide dough in half. Shape each half into 12 balls. Roll each ball into a 10-inch rope; tie into a knot and tuck ends under. Place 2 inches apart on greased baking sheets. Cover and let rise until doubled, about 30 minutes.
In a small bowl, beat water and remaining egg. Brush over rolls. Sprinkle with sesame or poppy seeds if desired. Bake at 350ºF for 15-17 minutes or until golden brown. Remove from pans to wire racks to cool.
Notes: In the winter time my kitchen is cold (my whole house is cold) and so it takes longer for these rolls to rise. This is also an easy recipe to cut in half if you only want to make 12 rolls.
I have enjoyed sharing some of my family's favorite recipes again with you this year. Have a very Merry Christmas!
Wednesday, December 23, 2009
7-Layer Mexican Dip
My dip is actually only six layers because we don't like olives, but I'm going to give you the full recipe and you can decide for yourself if you want olives or not. This is a recipe that has been around for a long time. But it is such a good one, I still love making it for get togethers. I just made this Sunday for our group of Christmas carolers - we went out singing to neighbors and then came back to our house to enjoy snacks and friendly conversation. If your lucky, you'll find red and green tortilla chips for everyone to dig into this dip with like I did.
7-Layer Mexican Dip
▪ 1 package 8 oz. cream cheese, softened
▪ 1 tablespoon taco seasoning mix
▪ 1 cup prepared guacamole
▪ 1 cup salsa
▪ 1 cup shredded lettuce
▪ 1 cup shredded cheddar cheese
▪ ½ cup chopped green onions
▪ 2 tablespoons sliced pitted ripe olives
Mix cream cheese and seasoning mix. Spread on bottom of 9-inch pie plate.
Layer remaining ingredients over cream cheese mixture. Refrigerate.
Garnish with cherry tomatoes, if desired. Serve with tortilla chips.
Notes: This is an easy recipe to spice up with hot guacamole or salsa. Yum!
Only 1 more recipe until Christmas!
Tuesday, December 22, 2009
Bohemian Rye Sugar Cookies
This is another of Grandma Van's, my husband's grandmother's, recipes. Every year she would make up a great variety of cookies and then package them into boxes for each of her grandchildren at Christmas. When I was dating Brendan in college, I was introduced to the cookies before I ever met the lady behind them. These were always one of the varieties included in the box. Although they are rather plain looking, their flavor is delicious. They are a crisp cookie that has a distinctive orange taste to them. Grandma Van died a little more than a year ago, but her memory and fabulous recipes live on.
Bohemian Rye Sugar Cookies
▪ 1 cup butter, softened
▪ 1 cup sugar
▪ 2 tsp vanilla extract
▪ 1 cup light Rye flour
▪ 1 cup all purpose flour
▪ 1 tsp baking soda
▪ ½ tsp salt
▪ 1-2 T. grated orange rind
▪ sugar, for dipping
Preheat oven to 350ºF.
Cream butter, sugar and vanilla, blend well. Sift together flour, baking soda and salt. Stir into creamed mixture. Add orange peel, mix well.
Form into 3/4 inch balls - place on ungreased (or parchment lined) cookie sheets. Flatten slightly with glass dipped in sugar. Bake for 10-14 minutes or until lightly browned on edges.
Notes: If you cannot find light rye flour, dark rye may be substituted, but the following changes should be made: dark rye flour should be only 3/4 cup, and all purpose flour increased to 1 1/4 cup. Be sure to store these in a tightly covered container so they keep their crisp texture. One last tip, be sure not to get the bitter white pith just under the peel of the orange - a microplane works wonderfully and quickly on getting the orange zest.
Monday, December 21, 2009
Cinnamon Apples
This is an easy but yummy way to make a meal more special. These apples are great as a side dish or on top of pancakes or waffles.
Cinnamon Apples
▪ ¼ cup butter
▪ 4 large tart apples, peeled, cored and sliced 1/4 inch thick
▪ 2 tsp cornstarch
▪ ½ cup cold water
▪ ½ cup brown sugar
▪ ½ tsp cinnamon
In a large skillet or saucepan, melt butter over medium heat; add apples. Cook, stirring constantly, until apples are almost tender, about 6 to 7 minutes.
Dissolve cornstarch in water; add to skillet. Stir in brown sugar and cinnamon. Boil for 2 minutes, stirring occasionally. Remove from heat and serve warm.
Notes: Even though this recipe calls for a tart apple, I usually use Golden Delicious. This makes plenty of syrup and is so good on pancakes!
Only three more recipes until Christmas!
Friday, December 18, 2009
Chocolate Peppermint Chip Cookies
I love the combination of chocolate and mint. Last year during December I posted two chocolate mint recipes, one for cake and one for bread. Now I give you this delicious combination in cookie form. Be careful, they are addicting!
Chocolate Peppermint Chip Cookies
▪ 1 cup butter, softened
▪ 1 ½ cups sugar
▪ 2 eggs
▪ 2 teaspoons vanilla extract
▪ 2 cups all purpose flour
▪ ⅔ cup cocoa powder
▪ ¾ teaspoon baking soda
▪ ¼ teaspoon salt
▪ 1 cup semisweet chocolate chips
▪ 1 cup Andes peppermint crunch baking chips
Preheat oven to 350ºF.
In large bowl, beat butter, sugar, eggs and vanilla until light and fluffy. Combine the flour, cocoa, baking soda and salt; stir into the butter mixture until well blended. Mix in the chocolate chips and peppermint chips until evenly distributed. Drop by rounded teaspoonfuls onto ungreased (or parchment lined) baking sheets.
Bake for 8 - 10 minutes, or just until set. Cool for two minutes on cookie sheet before removing to wire racks to cool completely.
Notes: The peppermint crunch chips look especially festive in these cookies because of their pretty red color. If you cannot find these (they seem to only come out at Christmas time, and even then can sometimes be hard to find) Nestle made a dark chocolate and green mint chip combination bag that I tried with good results as well. You can also make these with all chocolate chips for a really delicious chocolate chocolate chip cookie recipe good anytime of year!
Wednesday, December 16, 2009
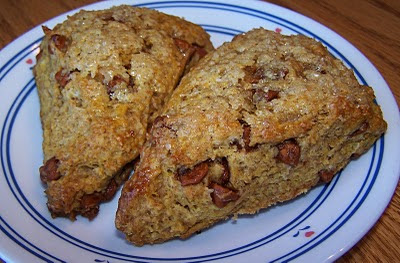
Pumpkin Scones
Another scone recipe? That is the question you may be asking yourself. First of all let me tell you I have become somewhat obsessed with scones. I think they get a bad rap, mainly because people are not eating good homemade scones, but dry, hard as rocks scones from the grocery store bakery. And this may not be my last scone recipe this year. I made a new recipe for one today, but haven't tried it yet. After they are baked and tasted, I'll let you know whether you might be seeing it later. But these pumpkin scones? These are yummy! I had to fool around with the original recipe a little, and the end result is a scone that is so good you'll want at least two to dip in your coffee or tea!
One more thing - if you end up loving making and eating scones as much as my family and I do, you can make a variety, freeze them before baking, then bake them all on one morning and have everyone's favorite!
Pumpkin Scones
▪ 2 cups flour
▪ ½ cup brown sugar
▪ ½ tsp ginger
▪ ¼ tsp cloves
▪ 1 tsp cinnamon
▪ 1 tsp baking powder
▪ ¼ tsp baking soda
▪ ¼ tsp salt
▪ ½ cup (1 stick) unsalted butter, frozen
▪ ½ cup cinnamon chips
▪ ⅓ cup buttermilk
▪ ½ cup pumpkin puree
▪ 1 tsp vanilla extract
Mix together flour, sugar, spices, baking powder, baking soda and salt in a large bowl. Grate butter into flour mixture using the large holes of a box grater. Use your fingers to work the butter into the flour (mixture should resemble coarse meal or crumbs). Stir in cinnamon chips.
In a separate bowl mix together the buttermilk, pumpkin, and vanilla. Using a fork, stir pumpkin mixture into flour mixture until large dough clumps form. Use your hands to press the dough against the bowl into a ball. (The dough will be sticky in places, and there may not seem to be enough liquid at first, but as you press the dough will come together.)
On a lightly floured pastry cloth (or other lightly floured surface) gently pat dough into a circle about 1 inch thick. Using a sharp knife cut into eight equal sized wedges. Place on cookie sheet lined with parchment paper. Brush with egg wash (one egg yolk mixed with 1 T. half and half or cream) and sprinkle with sanding sugar. Bake at 375ºF for 15 minutes and lightly browned or a toothpick comes out clean.
Notes: Cinnamon chips are very hard to find. Hershey's makes them and I think they may only come out at holiday baking time. If you can't find any, don't worry. You can make these scones without them, or substitute white chocolate chips, chocolate chips, or pecans for the cinnamon chips. As with any scones, do not overwork the dough. The dough should look somewhat ragged edged and there should be small butter clumps visible throughout.
A make ahead tip: After cutting into wedges and placing on parchment lined cookie sheet, freeze until hard, about one hour. Then transfer to a plastic bag for up to 3 weeks. When ready to bake, remove from freezer, brush with egg wash, sprinkle with sugar and bake as directed in recipe, but check after 20 minutes. DO NOT THAW!
Tuesday, December 15, 2009
My Coffee Is Coming!
My side of the family had a very early Christmas this year. We celebrated the first weekend in December and had tons of fun. We also exchanged gifts and my parents got me something I've been wanting for a long time, but being the practical person I am, would not get for myself until my Senseo coffee maker completely stopped working.
They got me a B30 Keurig personal coffee brewer! I have been looking at these for a few years now, and recently thought I might really want one due to the variety of coffee available for it. I especially want to get the "my K cup" so I can use any ground coffee, not just the k cups they sell. Not only will it be more economical, but I will have so many more choices than I had with my Senseo.
The Keurig came with 10 sample k-cups, all different. I have enjoyed some, some are too strong, and I still have a few yet to try.
But tomorrow, my order of k-cups from Keurig should be arriving on my doorstep, and I can't wait! I ordered two flavored coffees, two regular coffees, and a sample of five different flavored coffees. Of all the kinds I ordered, I've only tried one, the Green Mountain Nantucket Blend. The other ones are Green Mountain Spicy Eggnog Coffee, Chocolate Glazed Donut Coffee, and Tully's House Blend Coffee. Now that a definite chill has settled over Illinois, I'll be ready with lots of delicious, steaming hot coffee!
Monday, December 14, 2009
Peanut Butter Temptations
I know, another peanut butter and chocolate recipe. What can I say? I love pb and chocolate together! These little gems are so yummy. And they are fun, too! I often get questions on how I make these, along with requests for the recipe. They are actually quite easy.
Peanut Butter Temptations
▪ ½ cup butter
▪ ½ cup creamy peanut butter
▪ ½ cup brown sugar
▪ ½ cup sugar
▪ 1 egg
▪ ½ teaspoon vanilla
▪ 1½ cups flour
▪ ¾ teaspoon baking soda
▪ ½ teaspoon salt
▪ 1 bag (14 oz.) Reese's miniature peanut butter cups
Cream butter, peanut butter, and sugars. Beat in egg and vanilla. Mix together flour, soda, and salt and blend into creamed mixture. Shape into 1 inch balls and place in ungreased mini-muffin pans. Bake at 375ºF for 8-10 minutes until light brown. Remove from oven and immediately press one unwrapped peanut butter cup into each cookie. Cool for 10 minutes. Carefully remove from pan and let cool completely.
Notes: It is always a good idea to have the peanut butter cups unwrapped before the cookies come out of the oven. That way all you have to do is press the peanut butter cups into the cookie as soon as you remove them from the oven. Yum!
Friday, December 11, 2009
Chocolate Scones
Last year I posted a scone recipe and told anyone who read the post that if they had only eaten dry, hard scones, then they needed to try the ones I made. I still stand by that comment. After the success of my almond scones, I tried some new recipes. Here is one of my favorites. Decadent, rich, chock full of chocolate flavor, these scones will melt in your mouth and make you want to reach for another one.
Chocolate Scones
▪ 2¼ cups all-purpose flour
▪ 3 tablespoons cocoa powder
▪ ½ cup plus 2 tablespoons sugar
▪ 1½ teaspoons baking powder
▪ ½ teaspoon baking soda
▪ ¼ teaspoon salt
▪ 1¼ sticks (10 tablespoons) unsalted butter, cold, cut into small pieces
▪ 5 ounces semisweet chocolate, chopped into 1/3-in. to 1/2-in. pieces (1 cup)
▪ 1 large whole egg, plus 1 large egg yolk
▪ ½ cup plus 2 tablespoons heavy cream
▪ sanding sugar, for sprinkling
Line a baking sheet with parchment; set aside. In a large bowl, whisk together the flour, cocoa, sugar, baking powder, baking soda, and salt. Using a pastry blender, cut in the butter until the mixture resembles coarse crumbs with a few larger clumps remaining. Fold in the chocolate.
Whisk together the whole egg and 1/2 cup plus 1 tablespoon cream. Add the egg mixture to the flour mixture; using a rubber spatula, fold in, working in all directions and incorporating crumbs at the bottom of the bowl, until dough just comes together.
Turn out the dough onto a lightly floured pastry cloth (or other work surface). Divide dough in half and gently pat into two circles about 1 inch thick. Using a sharp knife or a pastry wheel, cut the circles into eight equal sized wedges. Place wedges about 2 inches apart on the prepared baking sheet. Cover with plastic wrap and freeze until the dough is very firm, at least 1 hour or overnight. (At this point, you can freeze the unbaked scones in a resealable plastic bag until ready to bake, up to 3 weeks.)
Preheat the oven to 375ºF. In a small bowl, lightly beat the egg yolk with the remaining tablespoon of heavy cream; brush over the tops of the scones and sprinkle generously with sanding sugar. Bake on parchment lined cookie sheet, rotating sheet halfway through, until the sugar on top of the scones is golden all over, or a cake tester inserted in the center of a scone comes out clean, 25-30 minutes. Transfer to a wire rack to cool. They are best eaten the day they are baked.
Notes:
It is important not to overwork scones. This is what make them tough. Handle them as little as possible. If the edges are a little ragged, that's ok!
What I love is that these are make ahead morning treats. All you have to do on the morning you need them is preheat your oven and bake as many as you want! Bake them right out of the freezer, DO NOT THAW! And if you aren't making the whole batch at once, you can even just brush cream, no egg yolk, over the top before sprinkling on the sugar. Also, check at 20 minutes - occasionally a smaller scone will bake this quickly.
Wednesday, December 09, 2009
Classic Candied Sweet Potatoes
Here is a side dish that goes well at Thanksgiving or Christmas, or heck any time of year! These sweet potatoes are easy to make, but a bit time consuming. But the final result is better than any sweet potato you've ever had. I promise!
Classic Candied Sweet Potatoes
▪ 6 sweet potatoes
▪ ½ cup butter
▪ 1 cup brown sugar, packed
▪ ½ cup water
▪ 1 teaspoon salt
Place whole sweet potatoes in a steamer over a couple of inches of boiling water and cover. Cook until tender, about 30 minutes. Drain and cool.
Peel and slice sweet potatoes (so they are in rounds) into 1 inch slices. Place in a 9 x 13 in. baking dish sprayed with cooking spray.
In a small saucepan over medium heat, melt butter, brown sugar, water and salt. When the sauce is bubbly and sugar is dissolved, pour over potatoes.
Bake in preheated 350ºF oven for 1 hour, occasionally basting the sweet potatoes with the brown sugar sauce.
Notes: I usually have to steam the potatoes in two batches because my steamer is not very large. These really are fantastic. Enjoy!
Monday, December 07, 2009
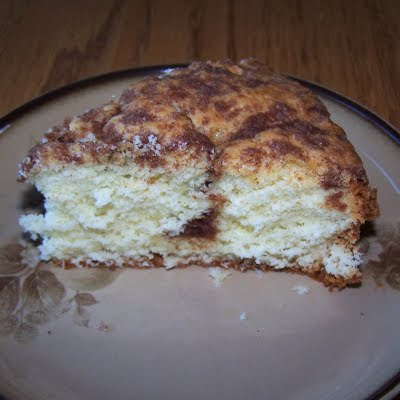
Cinnamon Crumb Coffee Cake
This is my favorite coffee cake recipe. I have made many different recipes, but this is the one I come back to time and time again. It is a little more work and takes a little more time, but the results are worth it! And everyone likes this one (even the kids) because there are no chunks in it. One other great thing about this recipe, it makes two! One to eat and one to share with a friend.
Cinnamon Crumb Coffee Cake
▪ ⅓ cup almond paste, packed
▪ ¼ cup butter, softened
▪ 1 cup 5 tablespoon sugar, divided
▪ ⅓ cup shortening
▪ 6 egg yolks
▪ ½ cup milk
▪ 2 cups cake flour
▪ 1 teaspoon baking powder
▪ 2 egg whites
▪ Streusel:
▪ ¼ cup all purpose flour
▪ ¼ cup sugar
▪ 1 Tablespoon cinnamon
▪ ¼ cup cold butter
Cream almond paste, butter, and 1 cup plus 2 T. sugar. Add Shortening; beat for 2 minutes. Add egg yolks; mix well. Gradually beat in milk. Combine flour and baking powder; gradually add to the creamed mixture and mix well.
In another bowl, beat egg whites until frothy. Beat in 3 T. sugar, 1 T. at a time, until stiff peaks form. Fold into batter.
Transfer to 2 greased and floured 8-in. round pans.
For streusel, combine flour, sugar and cinnamon in a bowl. Cut in butter until crumbly; sprinkle over batter.
Bake at 350ºF for 30-35 minutes or until toothpick inserted comes out clean. Cool for 10 minutes before removing from pans to wire racks.
Enjoy!
Friday, December 04, 2009
Peanut Blossoms
Okay, so this recipe is everywhere. But if you have never made these cookies, you are missing out. My husband even blogged about these a few years ago. Put simply, they are a delicious peanut butter cookie topped with a Hershey's Kiss. Peanut butter and chocolate. One of my favorite combinations!
Peanut Blossoms
▪ ½ cup shortening
▪ ¾ cup peanut butter
▪ ⅓ cup sugar
▪ ⅓ cup packed brown sugar
▪ 1 egg
▪ 2 Tablespoons milk
▪ 1 teaspoon vanilla
▪ 1 ½ cups all-purpose flour
▪ 1 teaspoon baking soda
▪ ½ teaspoon salt
▪ granulated sugar
▪ 1 9 oz. package Hershey's Milk Chocolate Kisses, (about 54)
Cream shortening and peanut butter in large bowl. Blend in white and brown sugars. Add egg, milk, and vanilla; beat well. Add flour, baking soda, and salt gradually; blend thoroughly. Shape dough into 1-inch balls. Roll in granulated sugar. Place on an ungreased cookie sheet. Bake at 375 ºF for 10-12 minutes. Remove from oven. Immediately place an unwrapped Kiss on top of each cookie, pressing down so that cookie cracks around the edges. Remove from cookie sheet. Cool on wire rack.
Yield: approx. 4 dozen
Notes: These are really pretty and festive if you mix some green and red sugar in with the regular sugar that you are rolling the dough in.
Wednesday, December 02, 2009
Bacon Wrapped Smokies
Everyone needs great appetizers at Christmas time. This is one great appetizer. This is one of those dishes that always disappears quickly because they are delicious and easy to eat! And even better, you can make them a few hours early and keep them hot in the crock pot, leaving your oven open for other dishes that need to be made.
Bacon Wrapped Smokies
1 lb sliced bacon, cut into thirds
1 (14 oz.) pkg. beef cocktail wieners
3/4 cup brown sugar
Preheat oven to 325ºF. Take one piece of bacon (a 1/3 piece) and wrap it around a cocktail wiener. Secure it with a toothpick. Continue until all wieners are wrapped in bacon. Place wieners on a large baking sheet covered in foil (or a large disposable roasting pan.) Sprinkle with brown sugar. Bake in the preheated oven for 40 minutes until the brown sugar is bubbly. Place under broiler for a minute or two, just until bacon is slightly crisped. Transfer to a crock pot set on low to serve.
Notes: I have burned these when I walked away from my broiler for too long, so keep and eye on them! They really only need a quick broil to crisp them up.
Tuesday, December 01, 2009
It's Coming Tomorrow!
Hello Friends. I know I have been away from the computer for a long time, but I have returned just in time to start my second annual 12 Recipes of Christmas! Starting tomorrow, I will post one recipe every Monday, Wednesday, and Friday and then each day the week of Christmas, until I have shared twelve of my favorite Christmas recipes. Maybe you will find one or two that your family loves, too. And if you are interested in last years recipes, click here.
Monday, October 05, 2009
Do You Believe?
My ten year old son still believes in Santa Claus. Except, he doesn't. Actually, it's a bit complicated what he believes. But he is right there on the edge of fantasy and reality. Starting to realize that the Easter bunny and Santa are a bit implausible. Especially the bunny.
He keeps asking me if Santa is real. Except he does it in front of his seven and five year old sisters. I always say I'd be happy to talk to him about it, in private. This has only stoked the fires of skepticism inside of him.
Yesterday he got a hold of my electronic organizer and was looking through it. I thought little of it until he said, "Mom, I found a list on here called 'Ian'. And on the list is everything I got in my stocking last year." So, I waited. He gave me a look like, "I'm onto you." But didn't say anything more.
About a half an hour later, he asks me how the Easter bunny got the Easter eggs in our house while we were in Ohio. (He told me a big pink bunny hopping all around the world is a bit unbelievable.) But he couldn't figure out how his mom and dad, who were in Ohio the entire weekend with him, got Easter eggs all over the house here in Illinois.
I asked him if he would like to know the truth. He giggled nervously but said he was afraid to know.
He is right there at that point where he is old enough to know, but is not sure if he wants to know or not. I think he believes Santa and the Easter bunny are not real, and that his Dad and I might be those characters, but he isn't quite ready to give up the joy and magic of Santa. And maybe the thought that with Santa, he could get almost anything he desired, but not so if it's us. I don't know for sure what it is , but I'm enjoying the ride.
Wednesday, September 30, 2009
Chalk Drawings
What do you do on a beautiful autumn day, especially when that day is the day before October starts?
You fill your driveway with chalk drawings of spooky Halloween creatures, of course!
And that's exactly what I did this afternoon with my two daughters.
There were black cats (1st drawing - mine, 2nd drawing - Zoe (age 5):
And jack o'lanterns (1st drawing - mine, 2nd drawing - Emma (age 7), 3rd drawing - Zoe):
A couple of mummies (1st drawing - mine, 2nd drawing - Zoe):
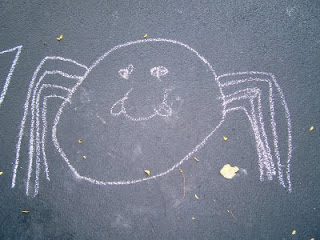
A few adorable spiders (1st drawing - mine, 2nd drawing - Zoe):
Some scary bats (1st drawing - Emma, 2nd drawing - Zoe)
Some not-so-scary skeletons (1st drawing - mine, 2nd drawing - Zoe)
Two cackling witches, and one that reminds me of the green witch from the Looney Tunes cartoons (1st drawing - mine, 2nd drawing - Zoe, 3rd drawing - Zoe)
Ghosts (both drawings - Zoe):
And last, but not least, our blood sucking vampire boys (1st drawing - mine, 2nd drawing - Zoe's, 3rd drawing - Zoe's)
Now we're all set for Halloween decorations, as long as it doesn't rain!
Friday, September 25, 2009
Our Brush With Fame
There are a lot of stories out there about stars behaving badly. Pretty much anytime you turn on your computer or walk through the checkout line at the grocery store, you can read about someone cheating on their husband/ wife, getting arrested on a DUI, having sex with underage girls.
But our experience this summer with some TV stars was completely different. It was all positive and the young stars we met and got autographs from were absolutely wonderful and great examples to kids about how to live your life.
On the Disney cruise we were lucky enough to go on this summer there were several Disney TV stars on the boat with us. They came out at different organized activities and were the epitome of well behaved. The highlight was a concert given by Corbin Bleu, of High School Musical fame and the next day a meet and greet with the stars that included a Q & A session and a chance to get autographs and pictures with the stars.
Corbin Bleu came onstage on a very hot afternoon and was super cool. He talked about his family and how much fun he was having on the cruise. Then he sang several songs that everyone rocked out to. But the best part, THE BEST PART - my niece (my goddaughter, to be exact) and one of the biggest Corbin Bleu fans in Ohio, got pulled onto stage where Corbin sang her a song!!! It was truly a magical moment. I don't think her feet ever came back down onto the deck after that!
This is the video of Corbin pulling my 13 year old niece up on stage. Really cool and sweet! (He brings her onstage at about the 2:21 mark)
At the meet and greet session the staffers on the cruise passed out numbers for your order for autographs. We got there a little late and got in the second set of 250. (I think they had 500 numbers to pass out). My nieces were in the first set of 250.
The stars on our cruise were of course Corbin Bleu, Tiffany Thornton, Doug Brochu, and Brandon Mychal Smith, all from "Sonny With Chance", and Roshon Fegan from "Camp Rock". They were all really kind and engaging, talking to the kids as they came through. I encouraged my kids to say something to each of the stars, but I think Zoe might have been the only one to go through with it.
The Disney Cruise "handlers" were basically trying to run everyone through, barking out at the parents to take the picture "while they are signing the autograph!". The Disney stars figured this out and started encouraging the kids to step back by them while they signed the books and simultaneously looking up and smiling for the camera toting moms and dads. Corbin Bleu recognized my niece and talked to her for a few minutes. He asked her name and thanked her for coming on stage. She in turn thanked him for taking her on stage. And no matter how much barking the handlers did, my sister got a picture of her daughter with Corbin Bleu!
By the time my kids got up on stage for autographs, the handlers had settled down a bit and I had an easier time of getting pictures of my kids with the stars. Brandon Mychal Smith (Nico on SWAC) noticed that all my kids were related and pulled them all in for a single photo with him. Tiffany Thornton even got Ian to paste a big smile on his face when she told him, "Get over here, cutie!"
My kids were definitely thrilled with the experience. But the thing that capped it all off was on the last night of the cruise. Most of my family was in Studio Sea on Deck 4 singing or listening to others singing karaoke. Ian wanted a drink so I told him to go up to Deck 9 where the drinks are complimentary. When he came back several minutes later his face was filled with a smile and his body was jumping up and down. He made a beeline for me and said, "I was just in the elevator with Tiffany Thornton and Brandon Smith! And Tiffany is nothing like her character!" Brandon told Ian he liked his shirt and Tiffany asked him what he was drinking. Ian couldn't believe they talked to him! It made him feel pretty special. And the more I think about it the more I am impressed with these young people. They did not have to talk to him. But they did. With a few simple words they made my son's cruise experience extra special. And in turn, mine too.
Subscribe to:
Posts (Atom)